Start Slideshow


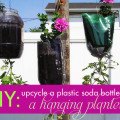 How to make a soda bottle planterIf you’ve consumed any type of soda or soft drink recently, chances are that you probably still have an <a href="http://inhabitat.com/a-kayak-made-from-recycled-bottles-navigates-argentinas-parana-river/">empty plastic bottle</a> lying around. As you’re undoubtedly an eco-conscious creature, you’ll likely pop that into your recycling bin at your earliest convenience—but did you know there’s something else you could do with that lovely little <a href="http://inhabitat.com/pop-culture-is-a-colorful-canopy-made-of-100s-of-recycled-bottles-in-nebraska/">bottle</a>? <a href="http://inhabitat.com/diy-how-to-make-a-hanging-bonsai-string-garden/">Growing plants</a> upside-down can actually yield far more growth than you’d expect; since their energy isn’t being used to keep them upright, they can harness all of that growing potential into making leaves and fruit, which is spectacularly awesome. If your space is small but gets plenty of light, try creating a few of these upside-down <a href="http://inhabitat.com/diy-how-to-make-your-own-green-terrarium-to-keep-or-give-away-for-the-holidays/">planters</a> and prepare to be amazed! Follow our 6 foolproof steps after the jump.1
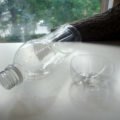 how to make a pop bottle planter<h3><big>STEP 1: Prep your bottle</big></h3> Use a sharp utility knife to cut off the base of the bottle about 1 inch above the bottom, and then wash and try the bottle thoroughly.2
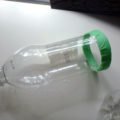 how to make a pop bottle planter<h3><big>STEP 2: Tape edges and thread</big></h3> Cover the exposed edge of the bottle with masking tape, and then punch 4 holes around it at regular intervals for the twine.3
 how to make a pop bottle planterCut equal lengths of twine/string/yarn and tie them securely through these holes. When you gather the ends together, the planter should hang straight down and not veer off at one angle or another.4
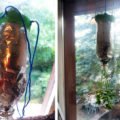 how to make a pop bottle planter<h3><big>STEP 3: Insert foil</big></h3> Cut a short length of aluminum foil, roll it into a tube, and line the bottle with it. This will add an insulating layer that serves a dual purpose: it’ll keep sunlight from drying out the soil, and it will draw heat from those happy sunbeams to keep the plant’s roots toasty-warm.5
 how to make a pop bottle planter<h3><big>STEP 4: Choose your plant</big></h3> Select the type of plant you’d like to grow: if you’re growing plants indoors, aim for culinary herbs like basil, parsley, cilantro, thyme, and rosemary, or simple lettuces like arugula. If you’ll be hanging these outside, you can plant small tomatoes, hot peppers, and even squashes! Just make sure to top up the soil of outdoor plants so they don’t get depleted as they grow their fruits or vegetables.6
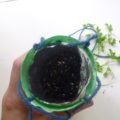 how to make a pop bottle planter<h3><big>STEP 5: Add soil</big></h3> Curl the tops of the seedlings in together to form a spear-like shape, and thread that gently through the pop bottle’s drinking spout so the leafy bits are sticking out the top, and the roots/soil are dangling inside. Flip the bottle so the spout is facing downward, and add in your soil. Don’t pack it in so tightly that the roots can’t spread out, but nudge it enough so the plant is held securely.7
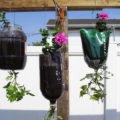 how to make a pop bottle planter<h3><big>STEP 6: Hang the planter</big></h3> Hang the planter in a place where it gets plenty of sunlight, and then water it. If water pours out the bottom where the leaves poke out, you’ve drenched it too much—it’ll take some practice to gauge the amount of water needed to keep the soil and roots moist without drowning the plant. Take into consideration the watering needs of the plants you’ve selected: hardy herbs like thyme and rosemary won’t need as much watering as lettuces, tomatoes or basil. You’ll be surprised at how quickly your plants will grow, and how much space is saved by cultivating them in this manner. Just make sure that you never cut more than 30% of a plant’s leaves at any harvest or it might die. Treat them gently and respectfully, and there will be joyful thriving all around.8


